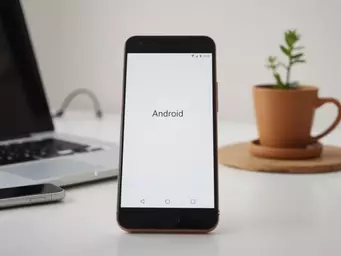
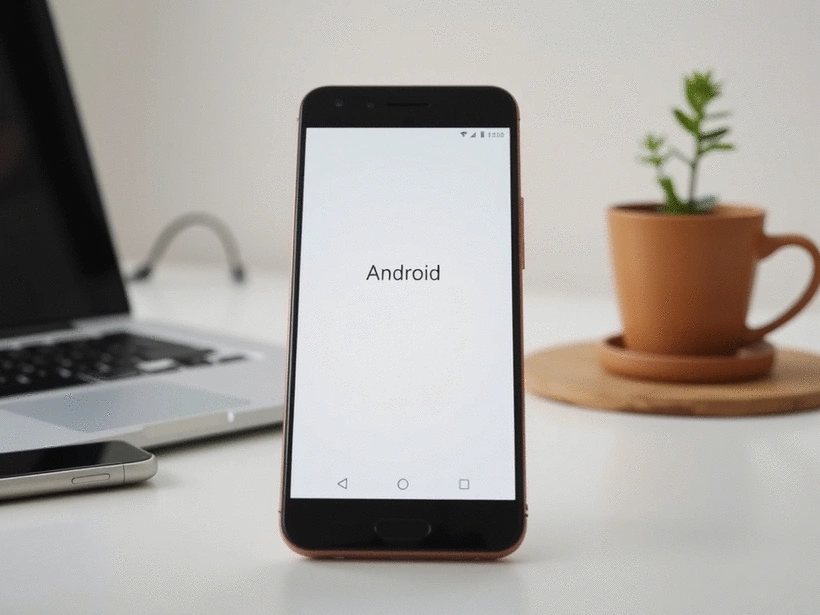
Set Up Your Android Phone
Your journey with a new Android phone in South Africa begins with excitement and a few essential steps. Did you know that taking time to prepare can significantly enhance your user experience right from the start? Let's dive into what you'll learn to make this transition as smooth as possible!
What You Will Learn
- Inserting your SIM card correctly is crucial to ensure connectivity.
- Connecting to Wi-Fi and signing into your Google account sets the foundation for your Android experience.
- Using the Device Setup Wizard can streamline your configurations.
- Regularly check for system updates to keep your device running smoothly.
- Customizing your home screen enhances usability and reflects your personal style.
Android Phone Setup Process Flow
A simple step-by-step guide to setting up your new Android phone, ensuring a smooth and efficient start.
Step 1
Inserting SIM Card
Locate tray, eject, place SIM, reinsert. eSIM activation via carrier.
Step 2
Connecting to Wi-Fi
Go to settings, select network, enter password, connect.
Step 3
Signing In to Google
Enter email and password, complete 2FA for access.
Step 4
Using Setup Wizard
Personalize settings, set security, choose default apps.
Step 5
Updating Device
Go to settings, system, system updates, download and install.
Step 6
Configuring Carrier Settings
Access APN settings for MTN, Vodacom, Cell C for optimal connection.
Step 7
Transferring Data
Use Bluetooth, Google Drive, Smart Switch, or USB cable.
Step 8
Customizing Home Screen
Change wallpaper, theme, organize apps, adjust notifications.
Step 9
Optimizing Settings
Battery management, accessibility features, privacy settings.
Step 10
Troubleshooting Issues
Restart devices, verify credentials, reseat SIM card for common fixes.
Getting Started with Your New Android Phone in South Africa
Congratulations on your new Android phone! Getting started can be exciting yet overwhelming, especially when you're not sure what to expect during the initial setup process. In this section, I’ll guide you through everything you need to know for a smooth transition to your new device, focusing on the unique aspects that South African users might encounter.

When you first power on your Android phone, it will prompt you to set up your device, connect to Wi-Fi, and sign in to your Google account. These steps can vary slightly depending on the manufacturer, but generally, you’ll find the process straightforward. I’ll break down the important tasks ahead to make this transition as seamless as possible!
Understanding the Basics of Android Setup
Here’s what you can expect during the setup process:
- Language selection: Choose your preferred language for the user interface.
- Wi-Fi connection: Connect to a secure network to download updates and apps.
- Google account integration: Sign in to access your apps, contacts, and backups.
- Device configuration: Follow instructions from the setup wizard for basic configuration.
Each step is designed to guide you through the process while ensuring you don’t miss any crucial settings. For example, connecting to Wi-Fi not only allows updates but also helps you avoid using mobile data unnecessarily right from the start! For a comprehensive guide on setting up your Android device, you can refer to Google's official Android support page.
Key Preparations Before You Begin
Before diving into the setup, it’s essential to prepare a few things:
- Backup old data: Ensure your contacts, photos, and important files are backed up from your previous device.
- Gather tools: You'll need your SIM card, Wi-Fi credentials, and potentially a charging cable.
- Charge your new device: Make sure your phone is charged to avoid interruptions during setup.
By taking these steps, you'll set yourself up for success! It feels great to have everything in place and ready to go. Plus, this way, you can ensure a smooth transition while making sure you have all your essential data ready for your new Android experience.
Step-by-Step Guide to Setting Up Your Android Phone
Step 1: Inserting Your SIM Card
To insert your SIM card, follow these simple steps:
- Locate the SIM card tray on your phone, often on the side.
- Use the included tool to eject the tray.
- Place your SIM card into the tray, ensuring it fits snugly.
- Reinsert the tray back into the phone.
If you have an eSIM, you can activate it by following the instructions provided by your carrier. This allows you to connect without a physical SIM card, which can be especially handy if you're looking to save space.
Step 2: Connecting to Wi-Fi
Next, let’s connect to Wi-Fi so you can start downloading apps and updates:
- Go to the settings menu by swiping down from the top of your screen.
- Select "Wi-Fi" and turn it on.
- Choose your network, enter the password, and tap "Connect."
This step is crucial for saving your mobile data and ensuring your phone is running the latest software versions. If Wi-Fi isn’t available, make sure to set up your mobile data correctly, which I'll cover later!
Step 3: Signing In to Your Google Account
Your Google account is vital for accessing apps, backups, and syncing your contacts. Here’s how to sign in:
- Select "Sign in with Google" during the setup process.
- Enter your email and password.
- If you have two-factor authentication enabled, complete the required steps.
Signing in ensures that you have a consistent experience across devices and can recover your data in case of any mishaps. For more information on managing your Google account on Android, you can visit the Android official website.
Step 4: Using the Device Setup Wizard for Configuration
The Device Setup Wizard is your personal assistant during the configuration. It will guide you through:
- Personalizing your device settings.
- Setting up security options like PINs or biometrics.
- Choosing default apps for various functions.
This feature is designed to simplify the process and make your new phone feel more personalized right from the start! For a broader understanding of Android basics, including setup wizards, GCFGlobal offers an excellent educational resource.
Step 5: Updating Your Device with System Updates
It’s important to keep your Android phone up to date. Here’s how:
- Go to "Settings" and select "System."
- Tap "System updates." Your phone will check for available updates.
- Follow prompts to download and install updates.
Regular updates not only enhance performance but also keep your device secure from vulnerabilities. Always make sure this step is part of your setup routine!
Step 6: Configuring Carrier Settings for South African Networks
To ensure optimal connectivity, you need to configure your carrier settings:
- Access "Settings" and go to "Network & internet."
- Tap on "Mobile network," then "Advanced," and select "Access Point Names (APN)."
- Enter the APN settings provided by your carrier (MTN, Vodacom, or Cell C).
Correct APN settings improve data performance and ensure you have a reliable connection.
Step 7: Transferring Data from Your Old Device
Transferring data is crucial for a smooth transition. Here are effective methods:
- Bluetooth transfer: Pair both devices and send files directly.
- App-based transfers using tools like Google Drive or Samsung Smart Switch.
- Manual transfer using a USB cable and your computer.
Choose the method that best suits your needs and convenience. Transferring your data ensures you don’t lose any important files as you move to your new Android phone!
Step 8: Customizing Your Phone's Home Screen and Notifications
Make your phone truly yours! Here’s how to customize:
- Change the wallpaper and theme from the home screen.
- Organize apps into folders for easy access.
- Adjust notification settings for your favorite apps.
Customizing your home screen not only makes your phone more aesthetically pleasing but also enhances usability based on your preferences.
Step 9: Understanding Android Settings for Optimal Performance
Optimizing your Android settings can greatly enhance your experience. Consider these:
- Battery management: Check battery saver options to extend usage.
- Accessibility features: Tailor your settings to improve usability.
- Privacy settings: Review app permissions regularly.
By fine-tuning these settings, you'll ensure your device runs smoothly and securely, making it easier to navigate and enjoy!
Step 10: Troubleshooting Common Setup Issues
If you run into issues during setup, don’t worry! Here are common fixes:
- Wi-Fi connectivity problems: Restart your router and phone, then reconnect.
- Account access errors: Ensure you’re using the correct credentials.
- SIM card not recognized: Reseat the SIM card and try again.
These simple troubleshooting steps can save you a lot of time and frustration. Remember, I’m here to help you navigate these challenges!
Pro Tip
Did you know? Customizing your Android device can significantly enhance your user experience! Take a few minutes to explore options like changing your wallpaper, organizing your apps into folders, and adjusting notification settings. This not only makes your phone more visually appealing but also tailors its functionality to better match your daily needs.
Frequently Asked Questions (FAQs) About Android Phone Setup
- Q1: What are the first essential steps when setting up a new Android phone?
- A1: The first essential steps include inserting your SIM card, connecting to Wi-Fi, and signing into your Google account. These lay the foundation for your device's functionality.
- Q2: Why is it important to connect to Wi-Fi during the initial setup?
- A2: Connecting to Wi-Fi is crucial for downloading system updates and applications without using your mobile data. It also ensures your phone is running the latest, most secure software.
- Q3: How do I ensure all my data from my old phone is transferred to my new Android device?
- A3: You can transfer data using several methods, including Bluetooth, cloud services like Google Drive, manufacturer-specific tools like Samsung Smart Switch, or directly via a USB cable connection to a computer.
- Q4: What should I do if my new Android phone isn't recognizing my SIM card?
- A4: If your SIM card isn't recognized, first try reseating it in the tray. Ensure it's correctly placed according to your phone's instructions. If the issue persists, contact your carrier.
- Q5: How can I customize my home screen and notifications?
- A5: To customize, you can change your wallpaper and theme, organize apps into folders for easier access, and adjust notification settings for individual apps in your phone's settings menu.
Wrapping Up Your Android Setup Journey
Congratulations on successfully setting up your new Android phone! 🎉 Now that you've navigated through the initial steps, it’s time to reflect on what you’ve learned and how to make the most of your device. Here are some key takeaways for first-time users:
Key Takeaways for First-Time Users
- Inserting your SIM card correctly is crucial to ensure connectivity.
- Connecting to Wi-Fi and signing into your Google account sets the foundation for your Android experience.
- Using the Device Setup Wizard can streamline your configurations.
- Regularly check for system updates to keep your device running smoothly.
- Customizing your home screen enhances usability and reflects your personal style.
By taking these steps, you’re not just getting your phone ready; you’re also preparing to enjoy a world of possibilities that Android offers! Remember, every little tweak you make can contribute significantly to your overall experience.
Next Steps and Continuous Learning in the Android Community
As you grow more comfortable with your Android device, I encourage you to dive deeper into its features. There’s a vibrant Android community out there, full of tips and tricks that can help you unlock even more functionality. Consider exploring:
- Advanced customization options for your home screen and widgets.
- Productivity apps that can optimize your daily tasks.
- Security settings and best practices to keep your personal information safe.

You can find numerous resources, forums, and tutorials tailored specifically for South African users at TechWise Mzansi. Stay curious and don’t hesitate to ask questions—this journey is all about making technology work for you!
Engagement Opportunities
Share Your Experience with Android Setup
Now that you're all set up, I'd love to hear your thoughts! What was your experience like during the setup process? Did you encounter any challenges or surprises? Feel free to share your story or ask questions in the comments section below. Your insights can help others in our community!
Stay Updated with Android Tips and Online Resources
To keep your Android experience fresh and efficient, consider signing up for our newsletter at TechWise Mzansi. We regularly share tips, tricks, and guides that help you maximize your Android usage. Don’t miss out on the latest updates—join our community today and stay informed!
Recap of Key Points
Here is a quick recap of the important points discussed in the article:
- Begin your Android setup by selecting your language, connecting to Wi-Fi, and signing into your Google account.
- Backup your old data and gather necessary tools like your SIM card and Wi-Fi credentials before starting the setup.
- Use the Device Setup Wizard to personalize settings, including security options and default apps.
- Regularly check for system updates to enhance performance and security.
- Customize your home screen by changing wallpapers, organizing apps, and adjusting notification settings for better usability.